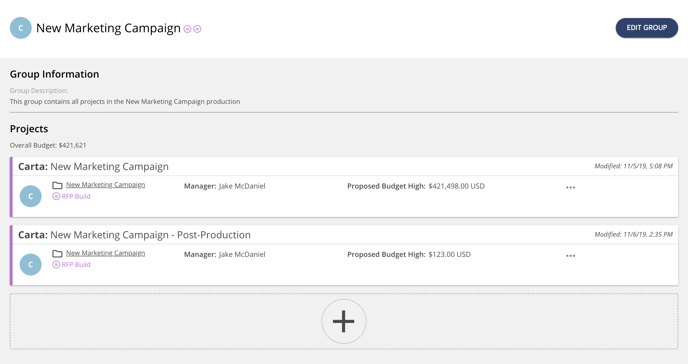
In the case that a user will request bids for elements of a production separately, it may be helpful to use a project group. A project group takes multiple project pages and organizes them in one concise view.
Because Octerra allows the selection of a single winning vendor for each project, the use of project groups is very handy! 👏
For the following example, we have a group of projects called “New Marketing Campaign” where a user wants to request bids for production shooting, post-production, and talent separately with different vendors for each element.
The user creates the first project page, provides a project name indicating for which element of production bids are being requested (e.g. "New Marketing Campaign - Shoot"), and then includes all the relevant project details for the vendor companies.
After the project has been submitted, it can be grouped with other project pages.
Create a New Project Group
To create a group, select the ellipsis icon(...) at the top right and select Add to Group.
.png?width=688&name=Screen%20Shot%202019-11-06%20at%202.25.31%20PM%20(Revised).png)
You will be presented a popup window with 2 options: 1) to create a new group or 2) to add this project to an existing group. “Yes, create new group” will be indicated by default. Here you will be presented options to provide information about the new project group.
.png?width=688&name=Screen%20Shot%202019-11-06%20at%202.33.50%20PM%20(Revised).png)
At the bottom of this popup, you can add pre-existing projects to the group if you would like. Start typing the name of the project and select it from the dropdown.

Click "yes" to group all of these projects together and then you will be redirected to the project group page.

Add a Project to an Existing Group
A project can be added to an existing group from the project page. To add a project to an existing group, select the ellipsis icon(...) at the top right and click Add to Group.
.png?width=688&name=Screen%20Shot%202019-11-06%20at%202.25.31%20PM%20(Revised%202).png)
On the popup, select “Yes, add to existing group”...
.png?width=688&name=Screen%20Shot%202019-11-06%20at%202.44.51%20PM%20(Revised).png)
...and select the project group you would like to add to from the dropdown.
Click "yes" to group all of these projects together and then you will be redirected to the project group page.
